In this QCAD tutorial, we check out the
selection filter of QCAD. The selection filter is a powerful tool to
select entities that match certain criteria. Example drawing:
map.dxf We will learn how to select entities based on
their type or their properties. The selection filter is a widget, similar like
the layer list or property editor. We can show the selection filter by clicking
the filter icon in the toolbar at the right. The selection filter widget is now displayed
at the right. This example drawing contains a section of a
city map. The map contains lines that represent the
various geographical features of the area such as the roads and
buildings. There are also text labels with additional
information like cadastral numbers. As we can see in the layer list, this drawing
is not properly structured with layers. All entities reside on the default layer
"0". The selection filter of QCAD can help us to
still work efficiently with such a drawing or to reorganize the
drawing with layers. First, let's put all text labels on a
dedicated layer called "Texts". For this, we need to select all text entities
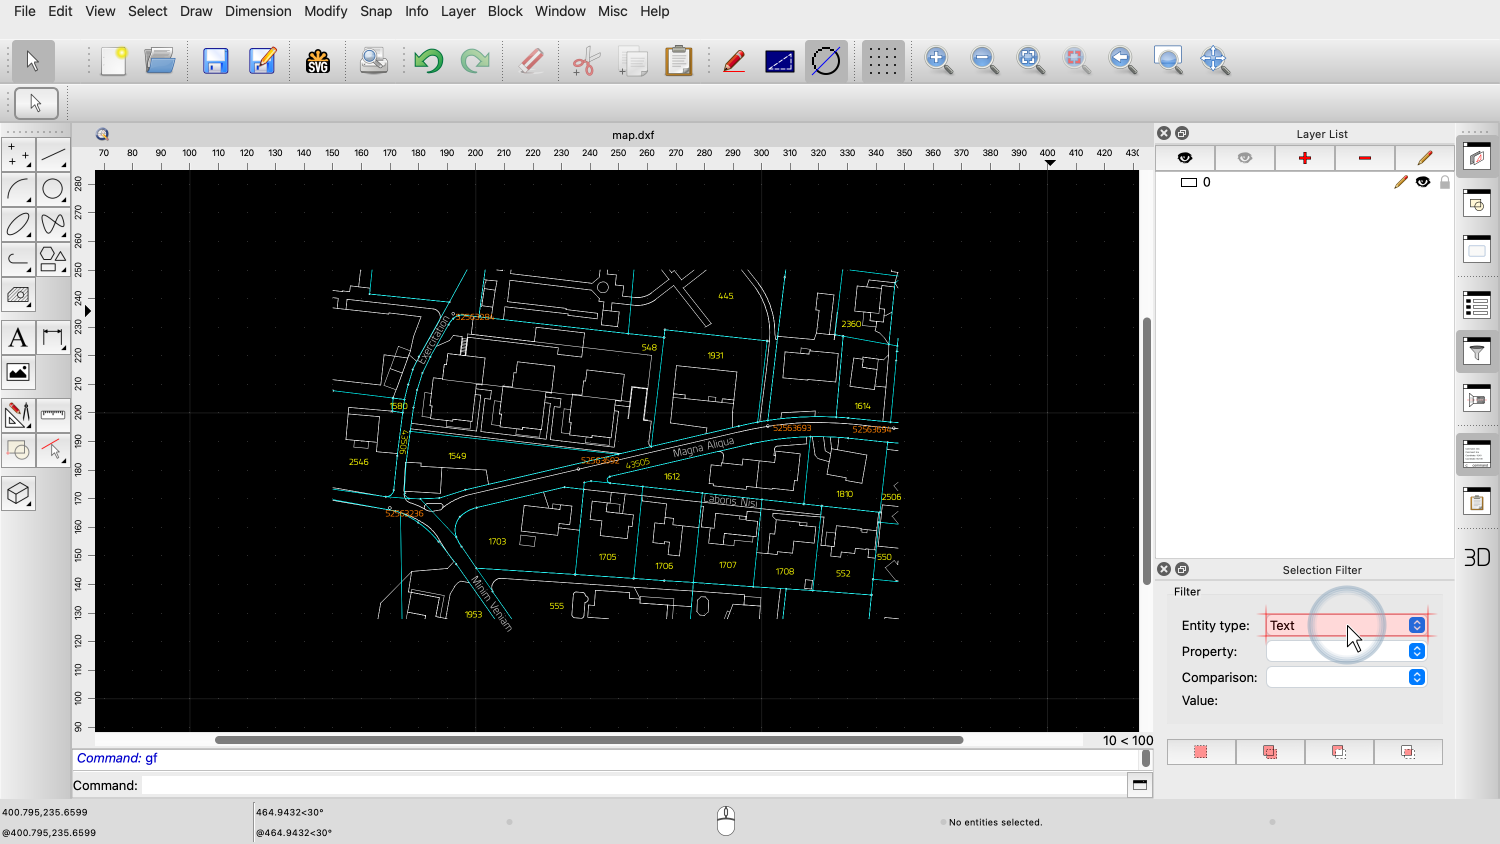
in the drawing. We choose the entity type we want to select in
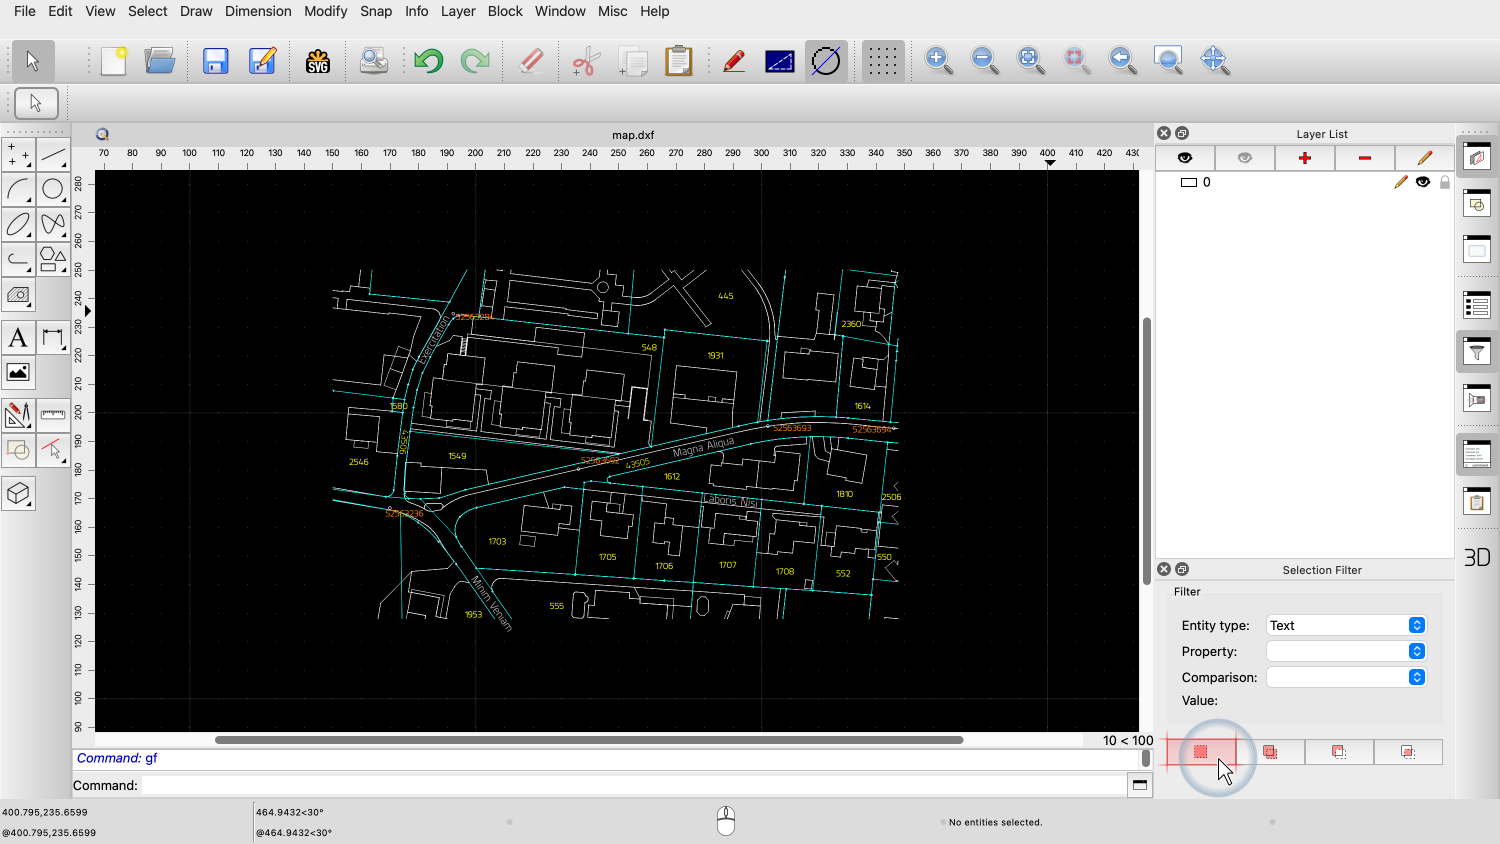
the selection filter widget. We can now click the button at the bottom left
of the widget to select all text entities. This button selects all entities that match
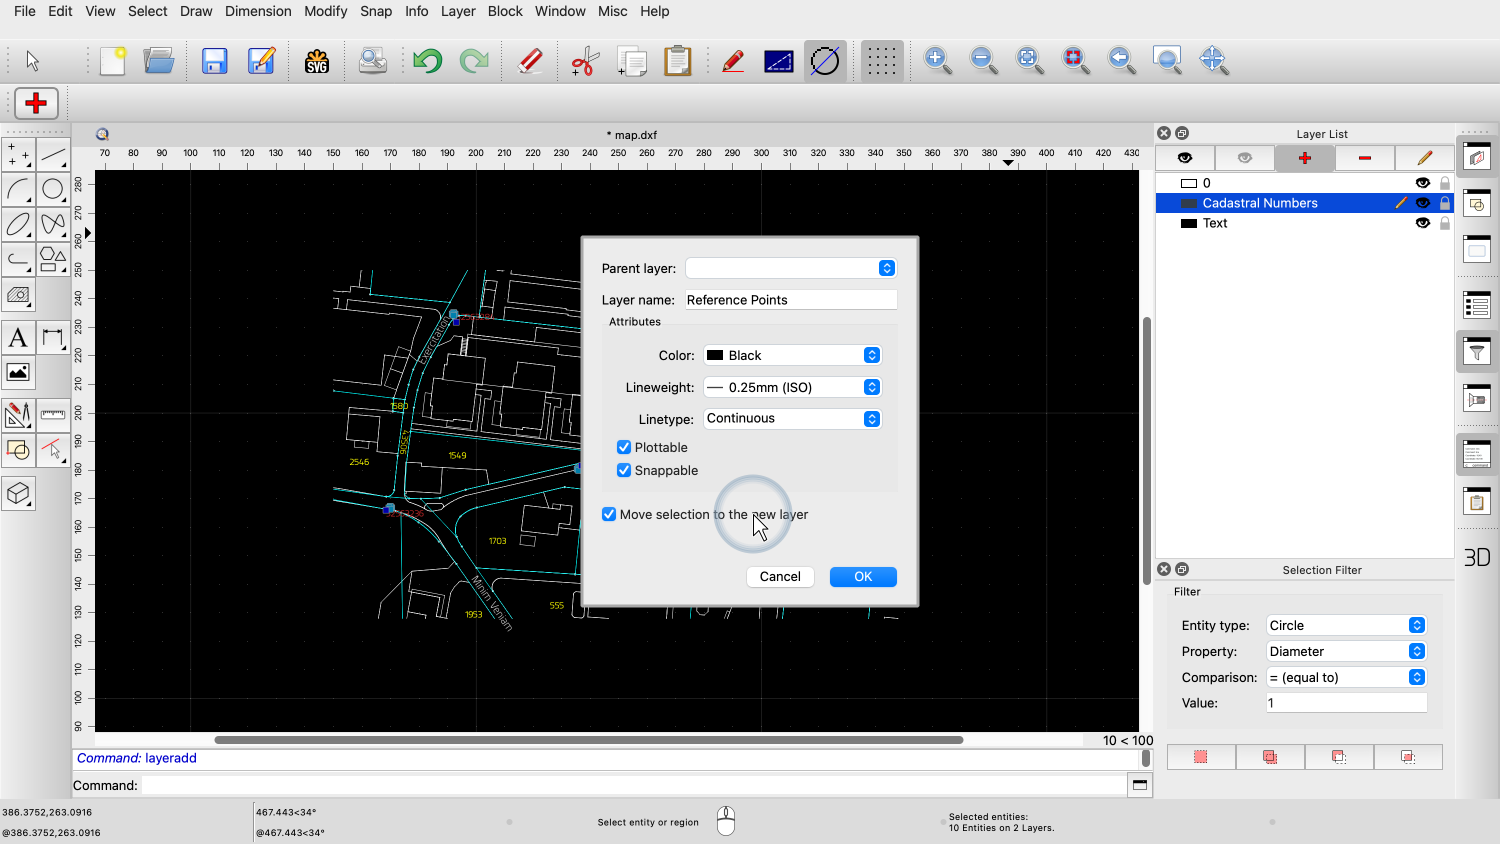
the current settings of the selection filter. We can now add a new layer based on the
current selection. We call our new layer "Text". We make sure that the current selection is
moved to the new layer. All text entities are now on their dedicated
layer. Most of the text labels are cadastral numbers
shown in yellow. We select all of these yellow text labels and
move them to a dedicated layer called "Cadastral Numbers". For this, we need to filter the text entities
based on their color property. We choose "Text" as entity type again. We choose "Color" as property to filter. We choose "equals" or "is" as comparison
operator. Finally, we set the value to "Yellow". We can now click the button at the bottom left
of the widget again to select all yellow text entities. We add a new layer based on the current
selection. We call that new layer "Cadastral
Numbers". Again, we want to move the current selection
to our new layer. All yellow text entities are now on their
dedicated layer. The selection filter can be used with four
different selection modes. The most common mode is "Replace Selection",
which replaces the current selection with the entities that match
the filter criteria. The second mode is "Add to Selection", which
adds the entities that match the filter criteria to the current
selection. The third mode is "Remove from Selection",
which removes the entities that match the filter criteria from the
current selection. The fourth mode is "Intersect with Selection",
which retains only the selection of the entities that are both in
the current selection and match the filter criteria. We demonstrate this again by selecting the
orange text labels in the drawing along with their circles which
indicate their exact position. We can see one of these orange text labels
with its circle here. First, we select all text entities with orange
color using the selection filter in "Replace Selection" mode. Next, we use the selection mode "Add to
Selection" to add the circles with diameter of 1 to the current
selection. All orange text labels along with their
circles with a diameter of 1 are now selected. We move the current selection to a dedicated
layer called "Reference Points". The selection filter offers many more
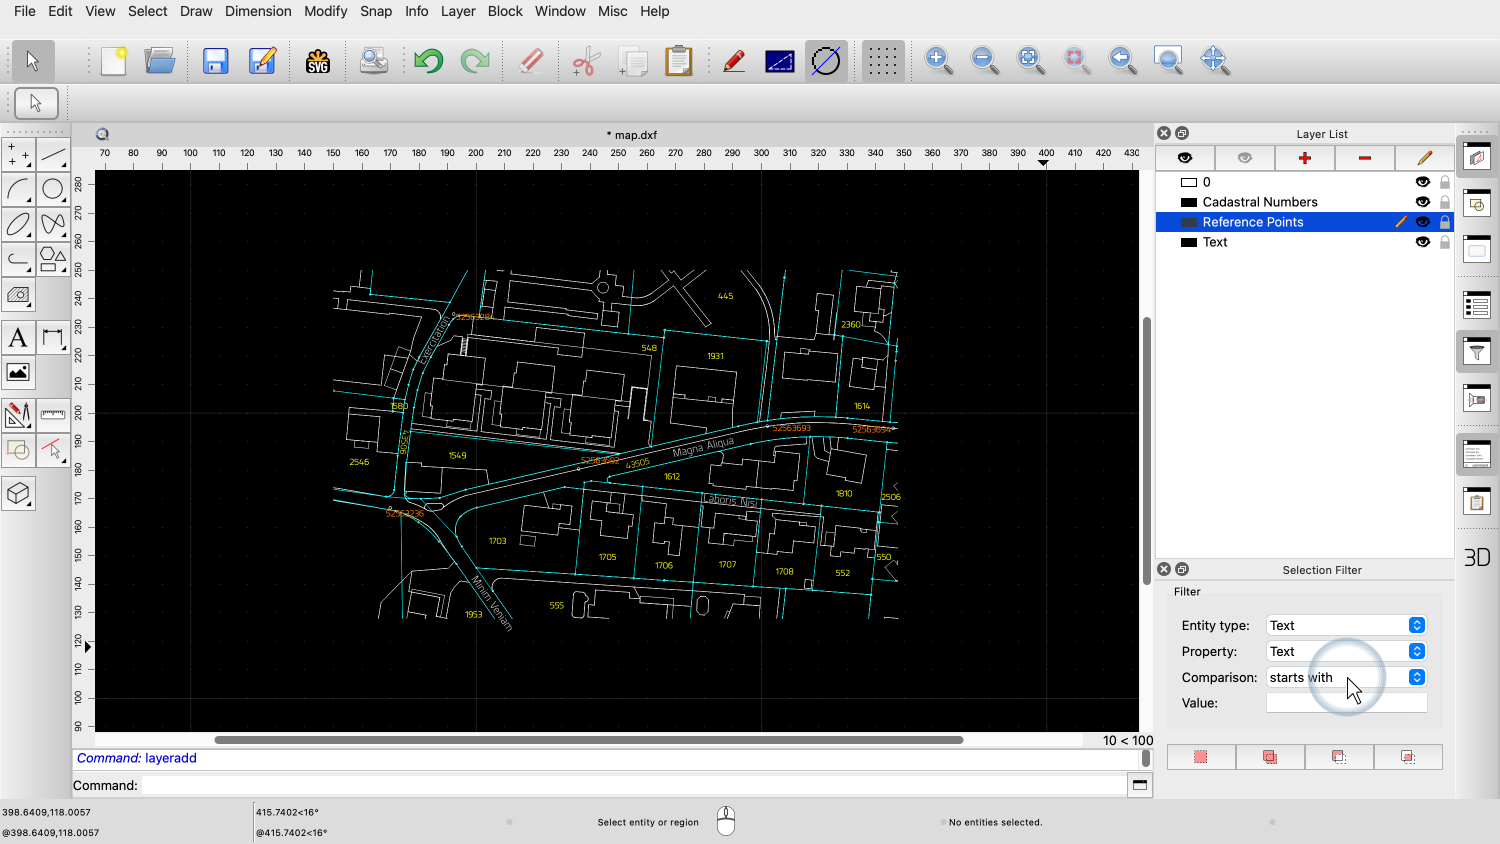
possibilities to select entities based on their properties. One more example use we want to show is to
select all texts that start with a given prefix. For this, we set the entity type to "Text"
again. We set the property to "Text", meaning we want
to filter based on the actual text content. We set the comparison operator to "starts
with". We set the value to "17" to select all texts
starting with "17". We click the button at the bottom left of the
widget to select all matching text entities. All text entities starting with "17" are now
selected. This way, the selection filter can be used
like a search tool to quickly find entities with a set of given
properties in the drawing. You should now know how to use the selection
filter of QCAD to select entities based on a given set of
properties. Be sure to practice this with your own
installation. Thank you for watching this QCAD tutorial.Video Transcript